

This article describes how to set up SolarAPP+ for jurisdictions with citizenserve online permitting software.
After completing these setup steps, jurisdictions who use citizenserve can automatically issue a local permit after the contractor uploads the approved documents, approval codes, and pays the jurisdiction's permitting fees.
The process works like this: The contractor submits an application through SolarAPP+ -which checks to make sure the project is safe and code compliant. If the application meets those criteria then the contractor pays a fee to SolarAPP+ (completely separate from the jurisdiction's permitting fees), then SolarAPP+ issues a SolarAPP+ ID that is specific to that project. The contractor is then directed on SolarAPP+ to the citizenserve online portal where they'll upload the approved documents and SolarAPP+ ID approval code in the online application. Once the contractor pays the online application fee, the system will automatically issue the jurisdiction’s solar permit. Here are the steps to configure citizenserve to process SolarAPP+ projects:
Contact team@solar-app.org if you experience issues on the SolarAPP+ site related to your setup.
Contact Support from your citizenserve account for questions about citizenserve configuration.
Jurisdiction Setup Tasks
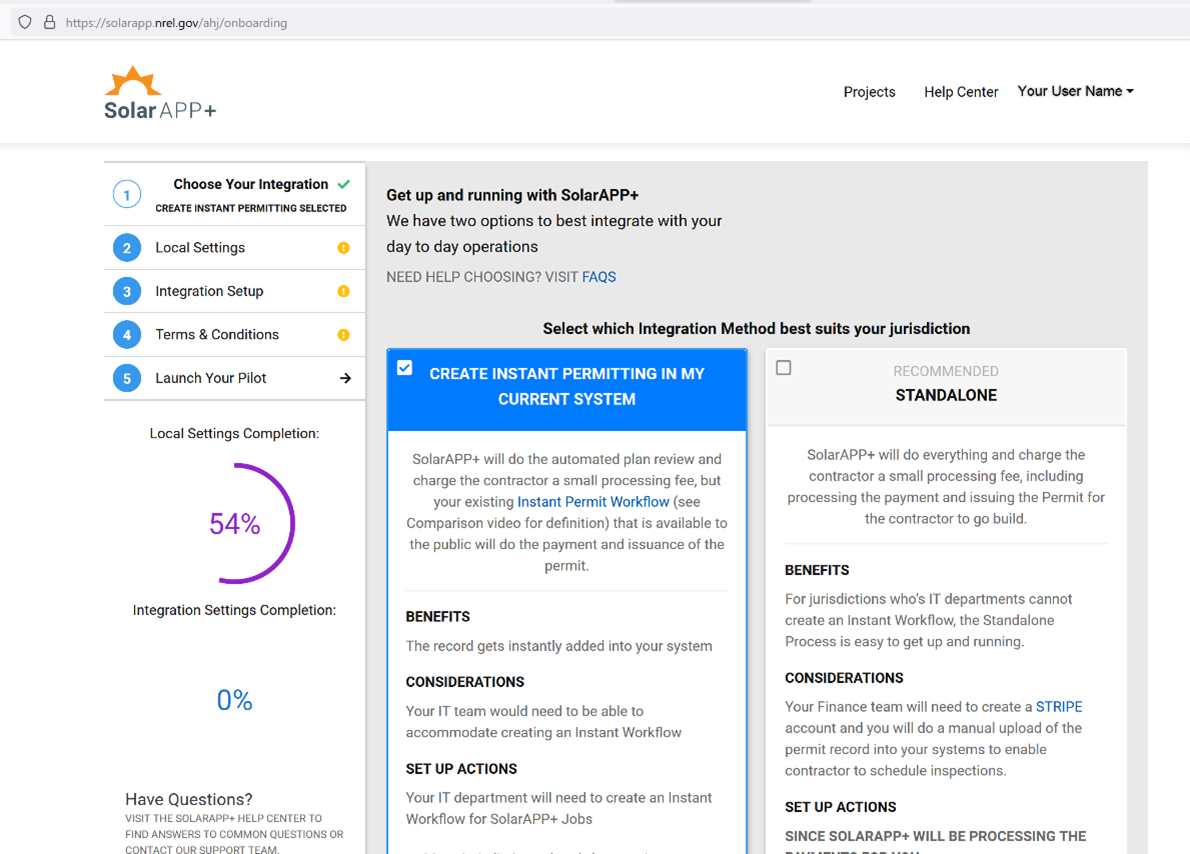
- Register at SolarAPP+.
- Select the Integration Option
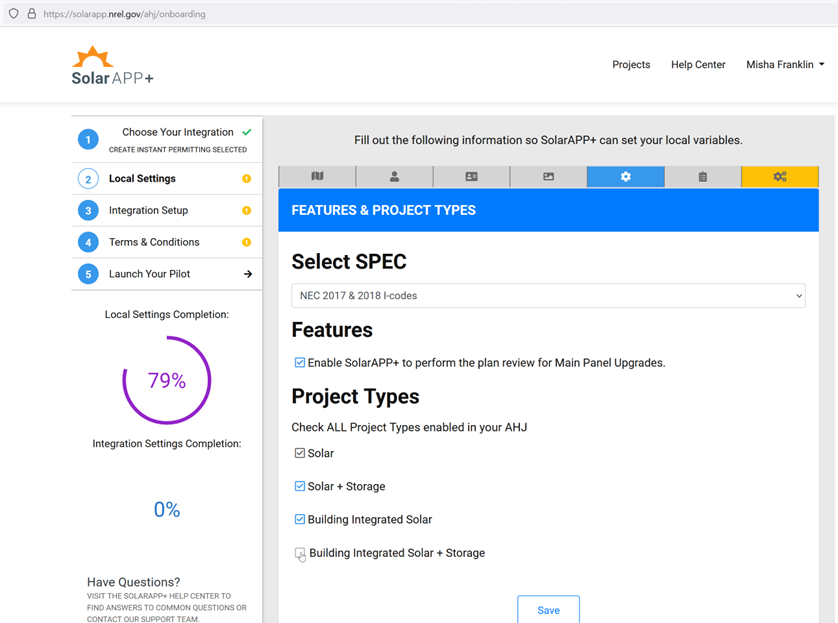
- Complete all tabs for your Jurisdiction’s Local Settings
Citizenserve Setup Tasks
Setting up a new permit is covered by your monthly subscription. If you’d like to do your own setup, you can complete most of it with administrator access. You must still submit a Support Request to automate the issuance of the permit. Alternatively, you can also submit a single request to have all items configured by citizenserve Support Center staff.
- Verify existing setup:
- These instructions assume your jurisdiction is currently using the latest citizenserve online portal with a payment processor configured to accept permit payments. If you have any questions about your existing setup, or need to add additional functionality, please submit a Support Request from your citizenserve account and we’ll help answer your questions.
- Set up a new Permit type (see example below)
- In Administration > Administration > Department: Select your Department > Lookups Type: Permit Types > Create New Permit
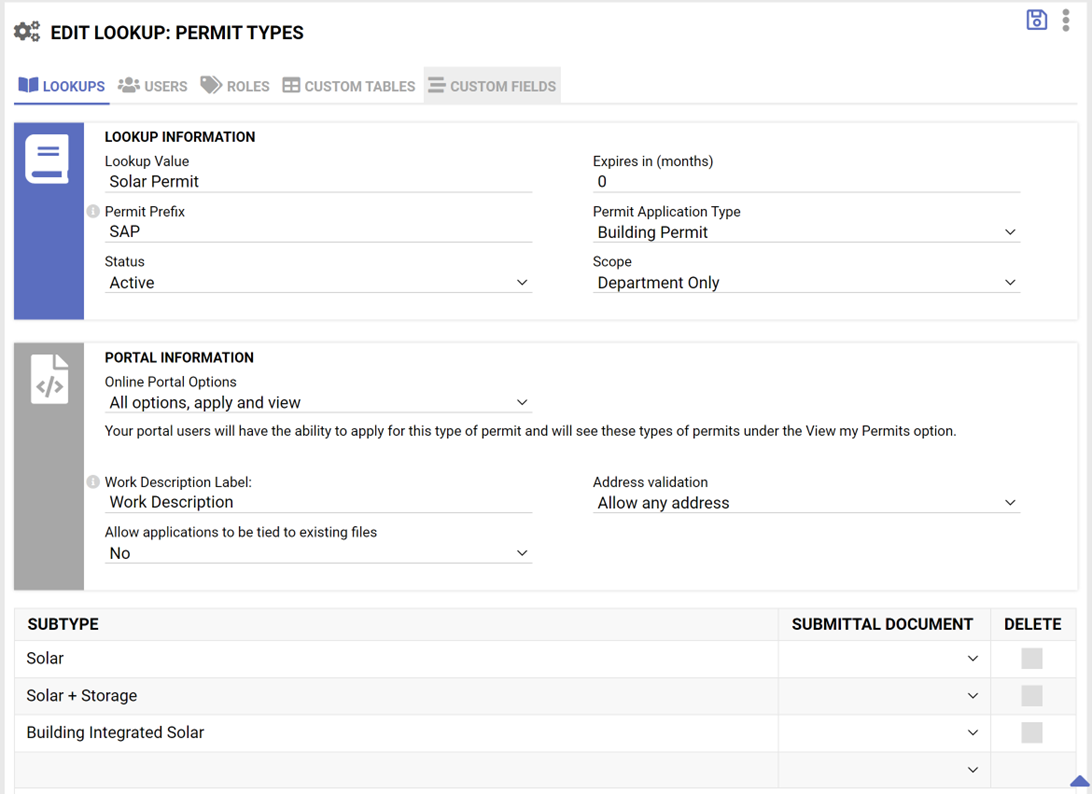
- NEW PERMIT TYPE INFORMATION
- Permit’s Lookup Value: the permit’s name.
- Expires in (months): leave blank.
- Permit Prefix: enter a new 1-3 character prefix. This prefix will be included as part of the permit number (e.g. SOL23-000001)
- Permit Application Type: determines where citizens access these permits on the portal. Building Permits are accessible from the Permitting Application menu. Development Applications are accessible from the Development Projects Application menu. Status: Active
- Scope: Typically, set to Department Only. If you have sub-departments set up and want the permit accessible, you can set to Shared for Sub-Departments
- Save the new permit type. Once saved, open the lookup for the permit type to finish the configuration
- PORTAL INFORMATION
- Online Portal Option: Set to All options, apply and view once you are ready to accept applications on the portal.
- Work Description Label: long text field displayed to portal user when they first apply. This is typically used for a full description, short description, or project name. Defaults to “Work Description”. May be changed to another label or question. Leave blank to remove the field from the portal.
- Address validation: set based on your jurisdiction’s permitting address rules.
- Allow applications to be tied to existing files: Typically, set to No, unless you would like to allow users to tie their SolarAPP+ permit to a previously submitted permit/project
- SUBTYPE: Add a subtype for each solar project type you configured in your SolarAPP+ local settings.
- FEE STRUCTURE: Add the Solar Fees to be collected by your jurisdiction. Note: the Administration > Portal > Payments > Permit Payment Options for the department that “owns” the solar permit dictates how fees should be set up:
- Option 1: If the owning department’s FEE COLLECTION OPTIONS = “Application fees required”, – the solar fees must be marked as “Plan Check” fees on the fee table.
- Option 2: If the owning department’s FEE COLLECTION OPTIONS = “Full payment required’, fees do not need to be marked “PlanCheck”.
- This process requires one of these options to be selected. If the remaining option “No Payment Required” is selected, the system will not generate the solar permit automatically.
- Set up the application by creating new Custom Table
- In Administration > Administration > Department: Select your Department > Select the Custom Tables tab > Select Add Table icon in top right corner.
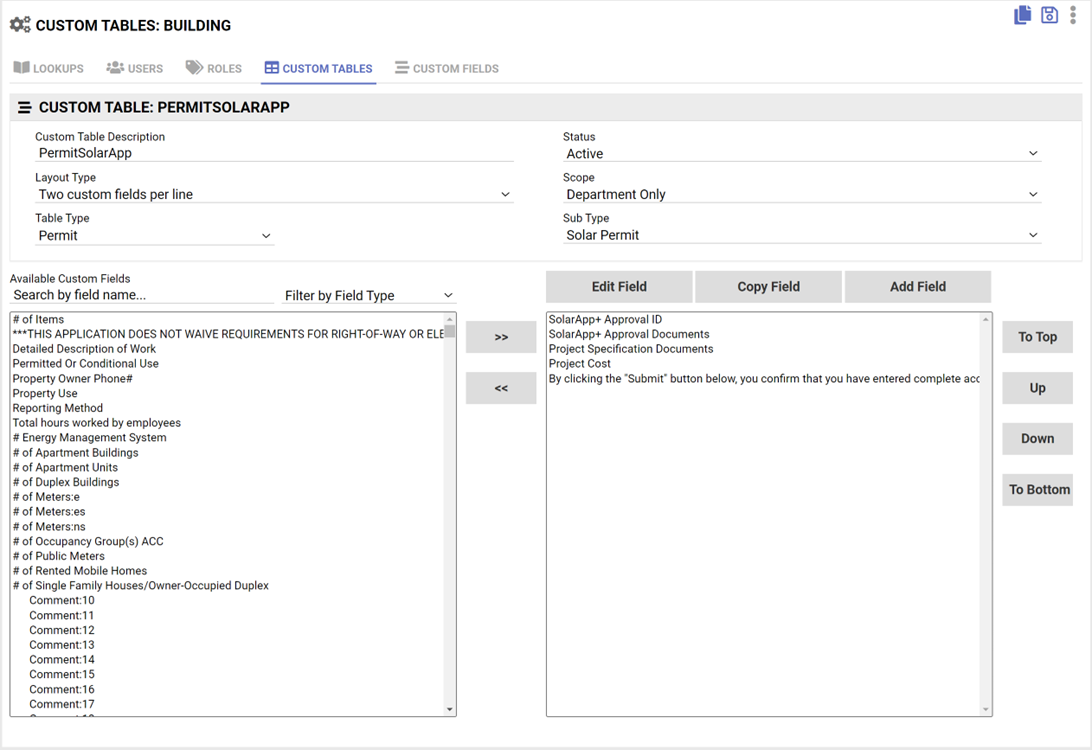
- Configure Custom Field settings
- Custom Table Description: add a unique name for this new table (common convention is “Permit” followed by your 1-3 permit prefix, e.g. PermitSOL).
- Status: Active
- Layout Type: Select your preferred option for One or Two custom fields per line. Recommended to select “Two custom fields”
- Scope: Typically, set to “Department Only”, unless users in a sub-department need to edit the table
- Table Type: Permit
- Sub Type: select your new permit
- Add SolarAPP+ Required Custom Fields:
- SolarAPP+ Approval ID in this format (SA202#####-###-#-#) (required)
- SolarAPP+ Approval Document (required)
- Product Spec Sheets (required)
- Add any other custom fields your jurisdiction would use to report or track your solar projects.
- Create Permit Certificate Template
- In Administration > Administration > Department: Select your Department > Lookups: Forms and Letters > Select the Add (document) icon in the top right.
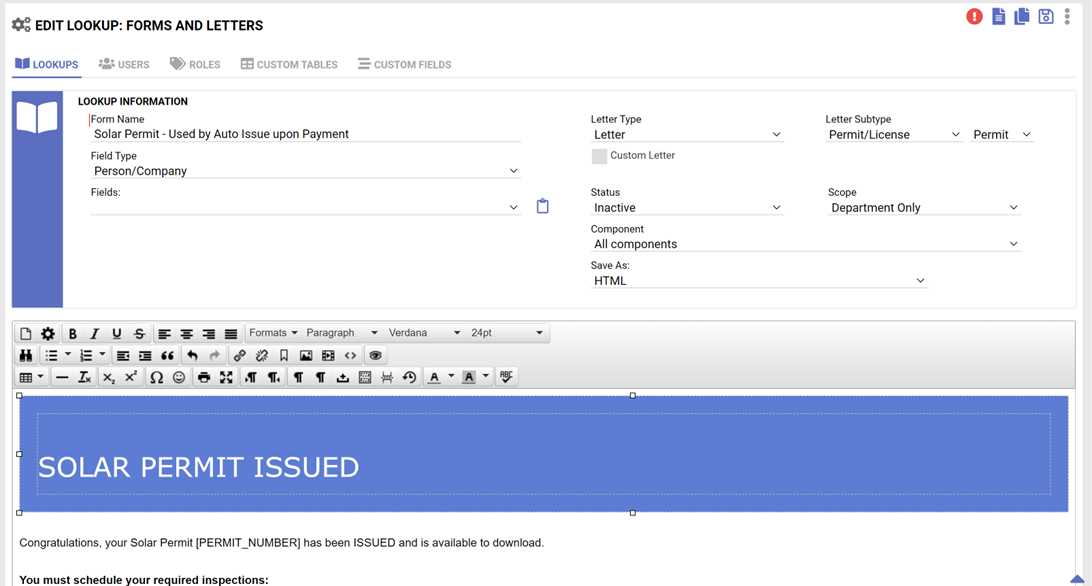
- Configure Form Information
- Form Name: Name of the form
- Letter Type: Letter
- Letter Subtype: Permit/License + Permit
- Field Type: Set field types to select from in Fields – to add database fields to your letter.
- Fields: displays fields depending on what is selected in Field Type.
- Status: Inactive prevents letter from displaying in letter generation menus.
- Scope: Department only
- Components: All components
- Save As: HTML
- Note: You may copy the HTML from an existing letter or standard email template. If you have questions on how to do this, please submit a Support Request.
- Configure Portal Payment Settings
- In Administration > Portal > Tab: Payments - portal setting must be updated to charge an application fee at submission – this is step C below.)
- Request Automation for Issuing the Solar Permit on payment.
- Submit a support request and ask citizenserve to copy over the [flp_285_issuepermit] process to issue a permit once it is paid.
Instructions for Contractors
- Receive Automated Plan Review Through NREL/SolarAPP+
- Submit your solar permit application, plans, and payment at https://solarapp.nrel.gov/.
- See this FAQ on how to submit a project through SolarAPP+.
- You must take, pass and send to team@solar-app.org the IREC SolarAPP+ training certificates, along with whatever licensing, certification requirements the jurisdiction requires.
(This can take several days, so please send those in before you attempt to submit for a SolarAPP+ project.)
- Receive SolarAPP+ approval which includes:
- A SolarAPP+ Approval ID
- Approved SolarAPP+ Inspection Checklist
- Apply for Instant Jurisdictional Solar Permit:
- On your jurisdiction’s online portal, submit an application for a solar permit, upload your SolarAPP+ Approval ID and SolarAPP+ Inspection Checklist, and pay for your application through the online portal.
- Enter a payment when prompted.
- The system will email you the permit.
